4 Easy Steps to Consider Before Reinstalling Your Tape-Ins
Blog
Introduction
Welcome to Courtney Taylor, your go-to source for all things related to arts, entertainment, visual arts, and design. In this article, we will be discussing the important steps you need to consider before reinstalling your tape-in hair extensions to ensure a successful and long-lasting result.
Step 1: Assess the Condition of Your Extensions
Before diving into the reinstallation process, it is crucial to assess the condition of your tape-in hair extensions. Check for any signs of damage, such as tangled or matted hair, excessive shedding, or loose tape bonds. If you notice any issues, it is recommended to consult a professional stylist for advice or consider replacing the damaged extensions.
Additionally, inspect the quality of the adhesive tape. If the tape has lost its stickiness or appears discolored, it's best to replace it with fresh tape to ensure a secure attachment.
Step 2: Prepare Your Natural Hair and Scalp
Prior to reinstalling your tape-in hair extensions, it is essential to properly prepare your natural hair and scalp. Start by washing your hair with a gentle clarifying shampoo to remove any product build-up or residues. Follow it up with a hydrating conditioner to restore moisture and nourishment to your strands.
After washing, dry your hair completely to ensure a strong bond between the extension and your natural hair. Avoid using any styling products or oils near the scalp, as they can interfere with the adhesive and weaken the bond.
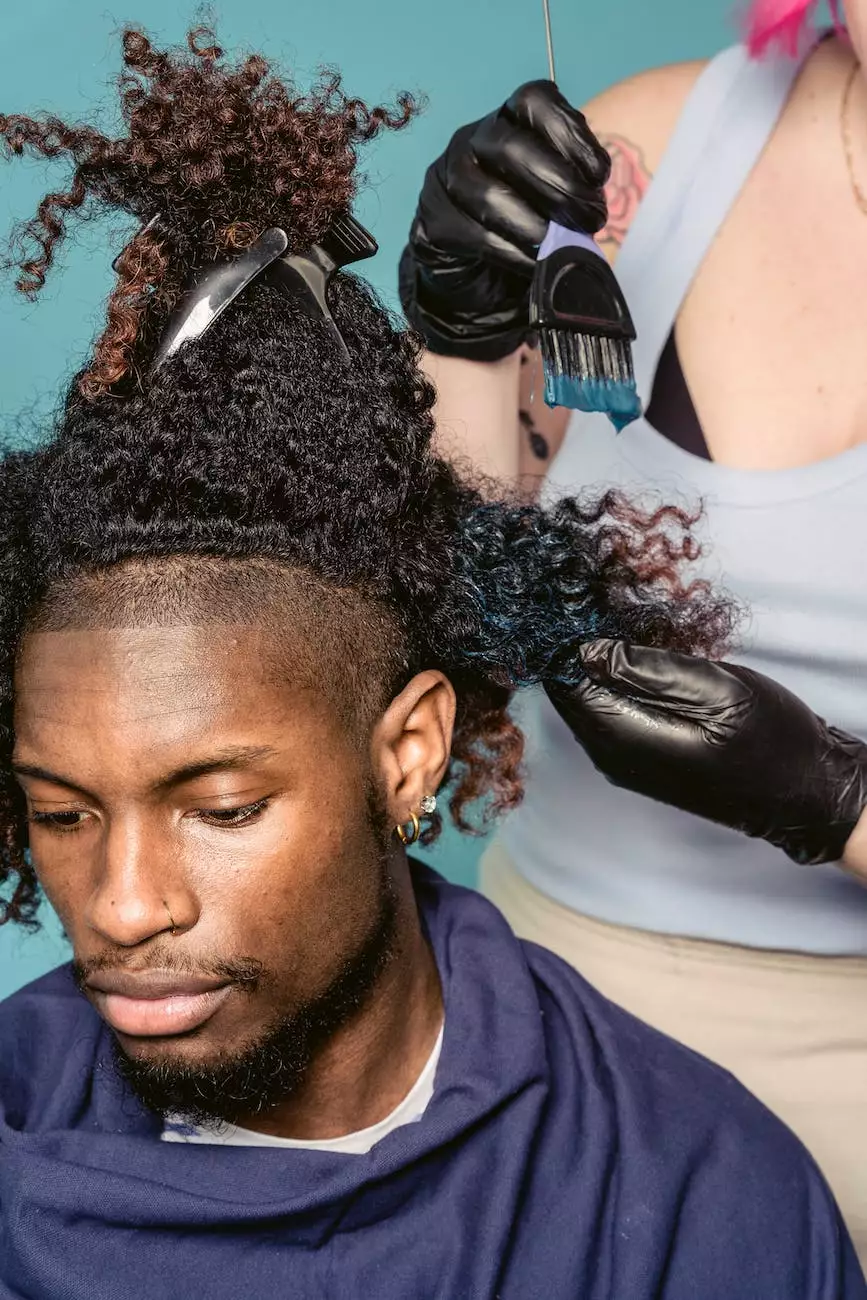
Step 3: Positioning and Securing the Extensions
Now it's time to position and secure the tape-in hair extensions. Start by parting your hair horizontally, about an inch above the nape of your neck. This will create a secure base for the extensions. Apply the first extension, making sure that the tape is placed flat against your scalp. Press firmly to ensure a strong bond.
Continue applying the extensions in a brickwork pattern, working your way up the back of your head, and then moving to the sides. Make sure to leave a small gap between the extensions and your scalp to allow natural movement and prevent discomfort.
Once all extensions are in place, gently press along the taped sections to ensure secure adhesion. Give the adhesive a few hours to set before washing or styling your hair.
Step 4: Proper Maintenance and Care
After reinstalling your tape-in hair extensions, it is crucial to follow proper maintenance and care routines to keep them looking fabulous and to prolong their lifespan. Here are a few tips:
1. Brush and Detangle Regularly
Use a wide-toothed brush or a brush specifically designed for extensions and gently brush your hair, starting from the ends and working your way up to the roots. This helps prevent tangling and keeps your extensions looking smooth and natural.
2. Avoid Applying Heat Directly to the Tape
Excessive heat can weaken the adhesive bond of the tape-in extensions. When using heat styling tools, such as flat irons or curling irons, keep them at least an inch away from the tape bonds to prevent any damage.
3. Wash and Condition with Care
When washing your hair, use sulfate-free and extension-friendly shampoos and conditioners. Gently massage the products into your scalp, avoiding excessive rubbing or pulling on the taped areas. Rinse thoroughly and ensure all the products are washed out to maintain the integrity of the adhesive bond.
4. Avoid Excessive Moisture
Avoid exposing your tape-in extensions to excessive moisture or prolonged exposure to water. If you swim or engage in activities that may result in excessive sweating, it is recommended to wear a swim cap or tie your hair up to protect the extensions.
By following these simple steps and maintenance practices, you can enjoy beautiful, long-lasting tape-in hair extensions that seamlessly blend with your natural hair.
Conclusion
Reinstalling your tape-in hair extensions doesn't have to be a daunting task. By carefully assessing the condition of your extensions, preparing your natural hair and scalp, positioning and securing the extensions correctly, and maintaining them properly, you can achieve a flawless and durable result.
At Courtney Taylor, we understand the importance of quality and attention to detail when it comes to visual arts and design. We hope this guide has provided you with valuable insights and tips for a successful tape-in hair extension reinstallation process. For further guidance or assistance, don't hesitate to reach out to our team of experts.